How to migrate/transfer a WordPress site to a new host Siteground
Tutorial Hosting
How to Migrate an Existing WordPress Website to SiteGround Hosting
Step 1: Log into Your Existing Website’s cPanel
Hey everyone, this is Kurt with Blue Rucksack calm, and today I’m going to be showing you how to migrate an existing WordPress website to SiteGround hosting. This video will be useful to you if you have an existing host and would like to move your website to SiteGround, or if you just purchased a website and would like to add it to your existing SiteGround hosting account. Now, if you don’t already have SiteGround, I would suggest that you use my link below to get a special offer, and the link is www.SiteGround.com/go/blue-rucksack.
To get started, we will log into our cPanel of our existing website. In the cPanel, we will scroll down to File Manager, click on File Manager, and scroll to the website that you would like to transfer. In this case, it is huckleberriesmoonshine.com. Go ahead and click on huckleberriesmoonshine.com.
Step 2: Compress Your Website Files
Select a file and then select all files. Now, you will want to compress these files into one zip archive. Click on Zip Archive, scroll down, and you’ll see an area to enter a name for your zip file. We will want to make this unique so we can find it so I’ll go ahead and put huckleberries and click on Compress Files. And then, you can see here that the zip file huckleberries.zip has been created. So, go ahead and click on that file and also click on your wp-config.php file and then click on Download.
Step 3: Download Your Website’s Database
You can see here they’re downloading. If we open up the file where these files were downloaded to, you can see here the huckleberries zip file and the WP config file.
Step 4: Download Your Website’s Database
Now, the next step is to download the database for the website. So, we can go back to our cPanel and in the cPanel, scroll down to PHPMyAdmin. Here, we’ll be able to see the databases that are connected to our hosting account. So, this is my cPanel login, so click that. We’ll see two databases. To figure out which database is related to our website, and you know, in depending on your case, there could be ten, fifteen, or twenty. In this case, I only have two. To figure out which one is related to this website in particular, we’ll open up our WP config file. So, I already have it open here, and this is what it looks like. We’ll scroll down to the database name, and for this particular website for huckleberries, it’s WP 744. So, keep that in mind, and I’ll come back to PHPMyAdmin, and I’ll find the WP 744. I’ll go ahead and open that database, and you’ll see multiple tables that are related to this website. So, we want to go ahead and select Check All and export these tables. Select Custom, make sure that all of the tables are selected, and scroll down to Object Creation Options and select Add Drop Table. Scroll down to the bottom, and select Go. And as you can see now, we are downloading our database.
Step 5: Upload Your Website Files to Your New Hosting Account
Now that we have downloaded our WordPress website files and our WordPress website database, we can move on over to our SiteGround hosting account and add our domain name that we would like to use. In this case, again, it is huckleberriesmoonshine.com. And I will go ahead and go to my SiteGround account, click on my accounts, and go to my cPanel.
Step 6: Add Your Domain Name to Your SiteGround Account
If you’re using any other hosts, these steps will be very similar. Logging into the cPanel, once you’re in your cPanel, click on Add-on Domains, and add your domain. Enter a password [Music], and at the domain, if you scroll down, you’ll be able to see your domain has been created. So, huckleberries moonshine so now we want to add our website files to that domain. So, we’ll return to our cPanel, scroll down to your file manager, and make sure that you are in the correct file folder. Here, I have huckleberries moonshine, and you can see that this file is practically empty. So, we want to upload our zip file, and here, you can see huckleberries zip folder. Let’s select open [Music]. All right, so you can see that the file upload is complete. We will return to our file manager, and you can see that it shows up. Then, we want to click on Extract, and again, make sure that your file path is correct. Huckleberries moonshine, extract the files, click reload, and here, you can see all of our website files.
Step 7: Create a New Database and Upload Your Website’s Database Files
Now that we have successfully uploaded our website files to our SiteGround hosting account, we will go ahead and create a new database and upload our website’s database files. So, we’ll go back to our SiteGround hosting account cPanel and we’ll scroll down to my SQL databases. On this page, we’ll create a new database. And you can call this just about anything you would like. I’m going to make it easy, just for the purpose of this tutorial, I’ll call it 1 2 3 4 5. Create database, and you can go ahead and copy this name down. The name of the database, we will need that in the next step. Paste that back to our cPanel.
Step 8: Create a New User for Your Database
Once that database has been created, you’ll be able to see it here. We’ll have to create a username, and to make this easy, suggest using the password generator, just to have a really strong password for your database. Go ahead and create one, and go ahead and select Copy. You will also want to document this password for future use. Select I have copied password in a secure location, use password, and create the user. Get back on this page, we will now add a user to the database. So, you can see here I have my username, HB 1 2 3 4 5, and the database that I’ve created 1 2 3 4 5, and what I’m going to be doing is adding this user to this database, so I can access it and edit it. Let’s go ahead and select Add, select All Privileges, and make changes. And now, you can see your user. You also want to select your username, select Copy, go ahead and document that in your file as well.
Step 9: Upload Your Website’s Database to Your New Database
The next step will be to upload your database that you downloaded from your website to your new database. To do that, go to your cPanel, scroll down, and find PHPMyAdmin. In here, you’ll see your database that you created, in my case, it’s one two three four five. Go ahead and select that database, and you’ll see that it is empty. You want to go ahead and select Import, choose file, and select the database that you downloaded, it’s the SQL file, open, scroll down, and click Go. And should just take a couple of seconds, and now you can see that it is successfully uploaded. Go ahead and click on that file again, you can see all of these options or all of these tables that were created.
Step 10: Change the Username and Password of the WP Config File
The next step will be to change the username and password of the WP config file. And that will be so you can log in again, access to your website. So, to do that, go back to your cPanel, on your SiteGround hosting account, and scroll down to the file manager, and the file manager again, make sure that you are in the correct path, in this case, huckleberries moonshine, and you will scroll down to the WP config file. Go ahead and select Edit. If you remember before when you open this up, you’re looking for a database name, so this is the old database name, database user, and database password. So, we want to update these with our new information. So, go back to your spreadsheet or file where you saved your username, password, select your database name, taste database name, password [Music], paste. Pay special attention to make sure that you do not delete anything outside, and that you enter these correctly. And let’s last we need our database username [Music]. Under ease, that is correct. We will go ahead and click on Save. It’s successfully saved. So, we can close that file, and now we have completed the upload of all files and name changing that was required.
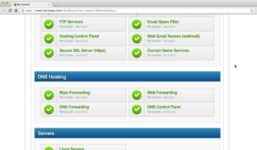
Step 11: Change the Domain Name Servers to Point to Your New SiteGround Hosting
The final step in moving your WordPress site to SiteGround hosting is to change the domain name servers to point to your new SiteGround hosting. To do this, you will go to your existing domain register, in my case, I’m with GoDaddy. I will log in, and I’ll find my domain, manage, I managed DNS. Scroll down to name servers, and you will want to click on Change. Next, you will go to your SiteGround cPanel account, and up top here, in the corner, you’ll see your name servers. These name servers point to your SiteGround hosting account to your cPanel. So, you’ll want to go ahead and copy ns1 SiteGround. You’ll want to paste it here where it says DNS one. There. This go back to your SiteGround hosting to your cPanel, and underneath number one, you’ll see number two. Go ahead and copy that one, paste that there. Go ahead and click Save. And that is all you will need to do. Now, it may take a little bit of time for your name servers to update, but within a few hours, you should be ready to log into your website, and that should complete the process of transferring your existing website to SiteGround hosting.
If you have any questions or need any help, go ahead and leave a comment in this comment section below, and I’ll be happy to help you. If you. If you found this video helpful, go ahead and give it a like, and don’t forget to subscribe to my channel. Thank you for watching.