CREACIÓN DE SITIO WEB EN WIX/Tutorial |INFO18| Tutorial Hosting
[Aplausos] [Música] Welcome to a new video! We are Norma Patricia Reyes Murillo, Alondra Rubí Reina Sánchez, and our server, Romero Salv. Today, we will teach you how to create a website using Wits. But before we start, let’s talk about what Wits is and what it’s used for.
Wits is a company that offers web development services based on the cloud. The platform allows users to create HTML 5 websites and mobile sites using online drag-and-drop tools. What is Wits’ editor? The editor is the platform you use to create a webpage, and it’s packed with functions that will help you create a professional and functional webpage. Within the editor, there are three main menus that allow you to perform a series of actions to create and manage your site.
Getting Started with Wits
Now that we’ve briefly explained what Wits is, let’s get started! We’ll go to our browser, in this case, Google Chrome, and type in the name "Wits." We’ll click on the first link that appears on the screen, and then we’ll give a click on "Start" to continue with the registration process. To register, you’ll need to create a Google account that’s already active. You’ll enter your email address twice and your password twice to confirm, and then you can create your account.
Creating Your Wits Account
After completing the registration process, you’ll be asked various questions so that the application knows what you really want for your website. In our case, we’ll select the option that says "For me, my business, or a friend." What do you want to create with Wits? You’ll be asked whether you want to create your page with Artificial Intelligence or create it yourself. We’ll select the option that says "Configure without AI" and then specify what our webpage will be about. In our case, we’ll create a webpage for our snow cone stand, "Nieves Cona."
Configuring Your Wits Page
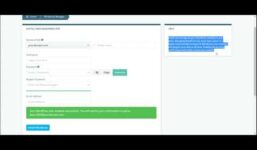
Once we’ve selected our option, we’ll enter the configuration page, where we’ll find the "Configure Your Restaurant" panel. Here, we’ll have the option to create a custom domain, as well as create our menu and design our site. We’ll select the option to create our menu and then enter the "Manage Menus" section.
Creating Your Menu
In this section, we’ll have the option to create a new menu. We’ll select the option that says "Menu of the Day" and then modify the description that appears at the bottom of the page. We’ll add an example of a menu that we can modify by day of the week or by dish name. In our case, we’ll organize our menu by day of the week, from Monday to Friday.
Configuring Your Menu Items
We’ll select each item and edit it to add the name of the product, price, and an image of the product. We’ll configure each section of our items and create our menu. Once we’ve created our menu, we’ll design our site using Wits.
Designing Your Wits Site
We’ll click on the "Design Your Site" option, and on the left side of the screen, we’ll see eight options. Each option has a specific function:
- Add Elements: This option allows us to add various elements to our site, such as text, images, and videos.
- Add Session: This option allows us to add a session, which can be a blank page, a welcome page, or a service page.
- Pages and Menus: This option allows us to create pages and menus for our site.
- Design Site: This option allows us to customize the design of our site, including the header, body, and footer.
- Add Applications: This option allows us to add applications to our site, such as social media links.
- My Business: This option allows us to manage our business, including adding forms and payments, and managing pages.
- Multimedia: This option allows us to add images to our site.
- CMS: This option allows us to manage the content of our site, including creating collections of content, creating dynamic pages, and collecting information from visitors.
Previewing Your Wits Site
Finally, we’ll click on the "Preview" option to see how our site will look. Once we’re satisfied with the design, we can publish our site.
I hope you enjoyed our tutorial. Don’t forget to like and subscribe for more tutorials. Thank you for your attention, and don’t forget that we’re proudly Alep.