How to create a subdomain on DreamHost
Tutorial Hosting
Creating a Subdomain in Dreamhost: A Step-by-Step Guide
Step 1: Accessing Your Dreamhost Account
Hola chicos en el vídeo de Hoy les voy a enseñar Cómo crear un subdominio en dreamhost es muy sencillo y fácil. Lo primero que debes hacer es dirigirte a tus sitios web y gestionarlos desde aquí. Por supuesto, tienes que tener un sitio web principal agregado. If you have already created a website, the only thing you need to do is click on "Add Website" here. You will then be able to choose a main domain and write, for example, "blog.yourmaindomain.com". Now, you need to click on this button.
Step 2: Choosing Your Main Domain
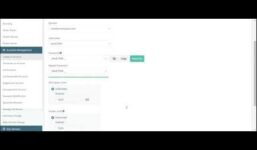
Ahora tienes que hacer clic aquí. Now, you can choose your hosting and redirect it without a web hosting or parking your domain. I will simply choose this option. You will then be asked to select a user or create a new subdomain. For this tutorial, we will choose the latter.
Step 3: Creating a New Subdomain
Puedes configurar el sitio web. Then, if this video has helped you, please give it a like, like, and subscribe to this channel. We will see you in the next video. Okay, bye.
Step 4: Configuring Your Subdomain
Now, let’s get started with the step-by-step process of creating a subdomain in Dreamhost.
Step 1: Accessing Your Dreamhost Account
To begin, you need to access your Dreamhost account. You can do this by logging in to your account using your username and password. Once you are logged in, you will be taken to your dashboard, where you can manage your websites.
Step 2: Adding a New Website
To add a new website, click on the "Add Website" button located on the top right corner of your dashboard. This will take you to a new page where you can enter the details of your new website.
Step 3: Choosing Your Main Domain
In this page, you need to choose your main domain. This is the domain that you want to use for your subdomain. For example, if you want to create a subdomain called "blog", you would choose your main domain as "yourmaindomain.com".
Step 4: Creating a New Subdomain
Once you have chosen your main domain, you need to create a new subdomain. You can do this by clicking on the "Create a new subdomain" button. This will take you to a new page where you can enter the details of your new subdomain.
Step 5: Configuring Your Subdomain
In this page, you need to configure your subdomain. You can do this by entering the details of your subdomain, such as the subdomain name, the document root, and the DNS settings.
Step 6: Setting Up Your Subdomain
Once you have configured your subdomain, you need to set it up. You can do this by clicking on the "Set up" button. This will take you to a new page where you can set up your subdomain.
Step 7: Verifying Your Subdomain
After setting up your subdomain, you need to verify it. You can do this by clicking on the "Verify" button. This will take you to a new page where you can verify your subdomain.
Step 8: Testing Your Subdomain
Once you have verified your subdomain, you need to test it. You can do this by clicking on the "Test" button. This will take you to a new page where you can test your subdomain.
Conclusion
And that’s it! You have successfully created a subdomain in Dreamhost. You can now use your subdomain to create a new website or to redirect traffic to your main website. Remember to always follow the best practices for creating and managing subdomains to ensure that your website is secure and easy to use.